

How it Works
Installation in 3 Easy Steps
-
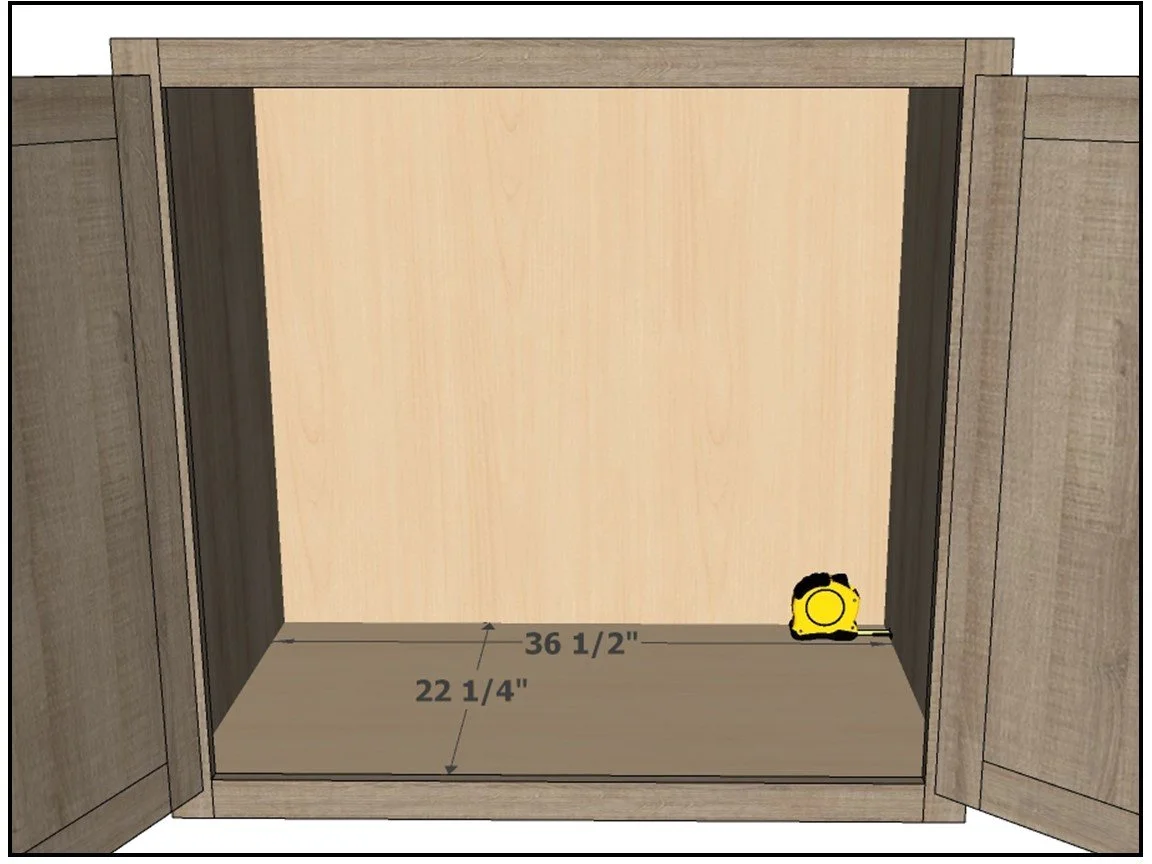
Measure
Take the following measurements of your cabinet:
1) Width: Measure inside your cabinet from side to side (not the face frame, if your cabinets have them).
2: Depth: Measure inside your cabinet from back to the front. If your cabinets have a face frame like is shown in the picture above, measure to the back edge of the face frame.
Is the depth measurement at least 21-1/2 inches? If so, you can move on to ordering. If not, contact us for custom sizing.
-
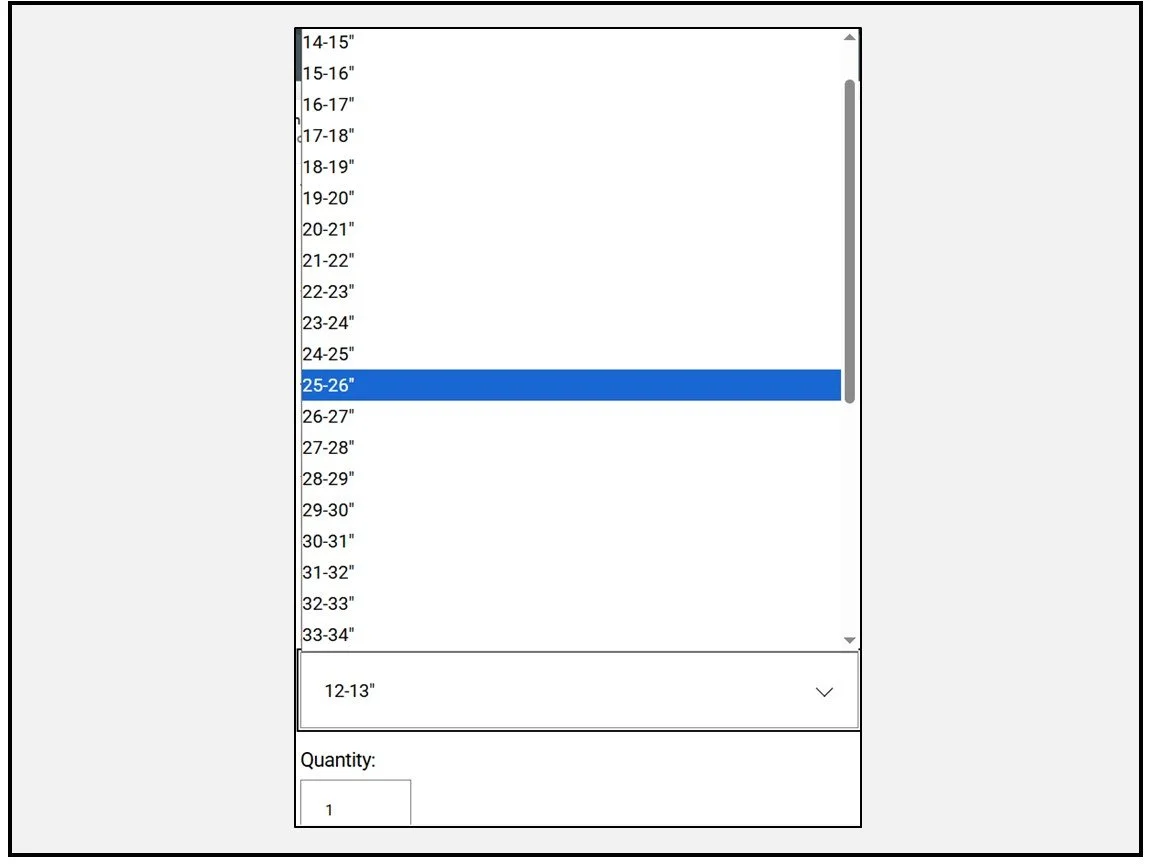
Order
Select the appropriate size Sheet Pan Organizer based on your width measurement. The drop-down menu for size shows ranges in inches (“).
For example, if you measured 34-1/2” width, select the option for 34-35”. The Top and Bottom Parts will be 33-3/4” Wide, and the Spring Mechanism will expand from 1/8” to 1-1/4” to fill the remaining width of your cabinet.
-

Processing Time
We make your Sheet Pan Organizer in Durango, CO when you place your order. The total time for manufacturing, quality control, and packing is up to 7 business days. At that time we ship your Organizer. Time in transit after we ship your order will depend on the UPS service level you select when you place your order.
When you receive your package, inspect for any visual damage to the box and take photos if there is damage. Carefully open the box so as not to damage the Organizer; then use these online instructions or download them here. Please contact us right away if there is any damage.
-
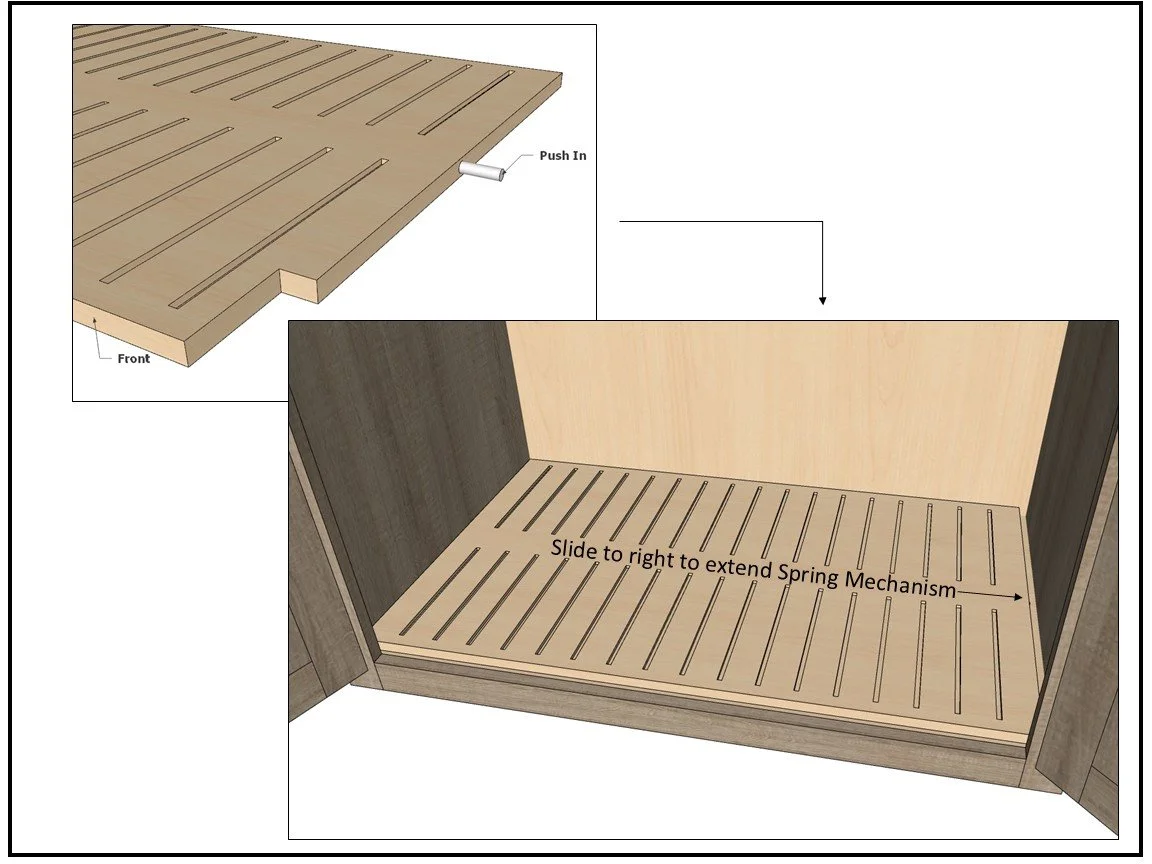
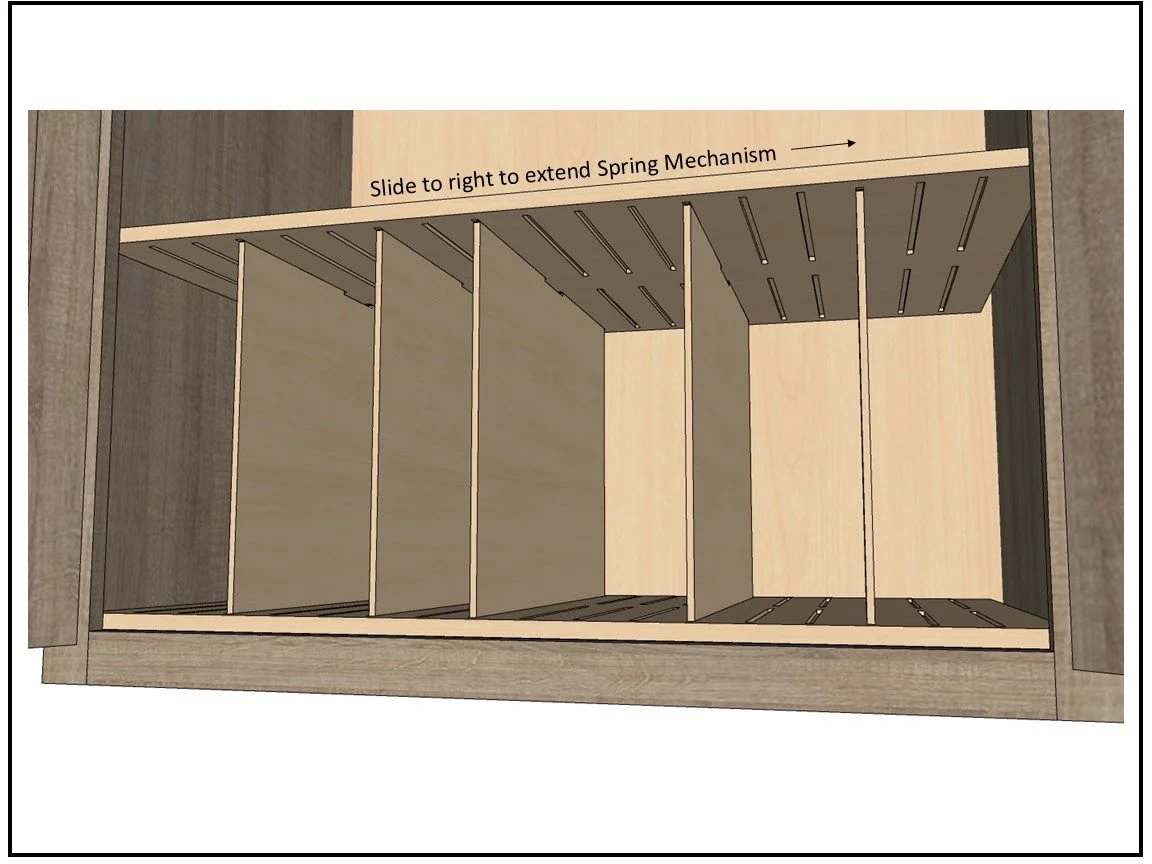
Installation: Step 1
Find the Top and Bottom Parts. These parts are identical. You can choose which side you want the spring mechanism on. The spring mechanism easily pulls out of the hole with your fingers and can be inserted in the hole on the opposite side. The spring mechanisms MUST be on the same side of the cabinet for installation or the divider grooves will not line up.
If the spring mechanism is extended, push it in until it stays in. Then, install the bottom with the grooves facing up.
Note: The Top and Bottom parts are notched on one side. If there is a hinge in the way, position the part so that the notched side faces out to avoid the hinge.
Next, press the side with the spring mechanism against the side of the cabinet to release the spring mechanism. Allow the Bottom part to be pressed against the opposite side of the cabinet by the spring.
-
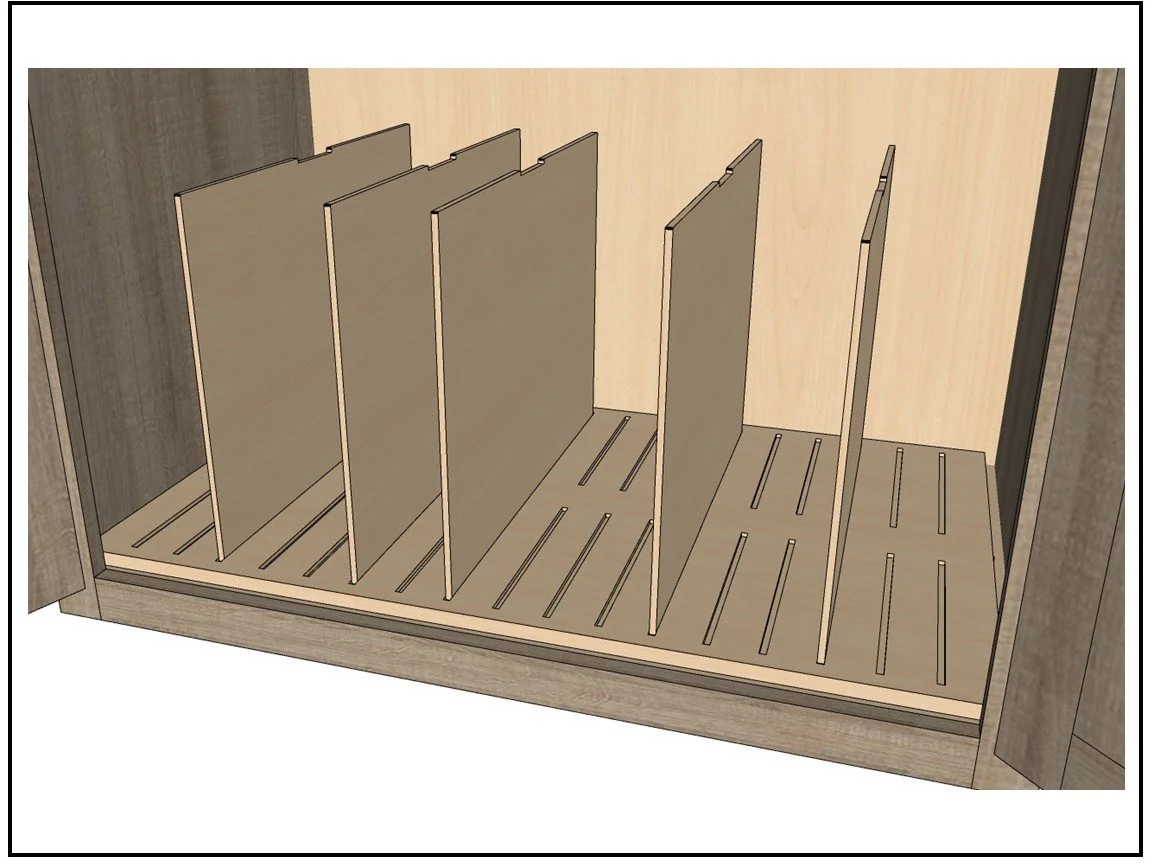
Installation: Step 2
Place the thin Dividers into the desired grooves in the Bottom Part. This is where you can customize the arrangement to suit your storage needs.
You can also choose if you want the curved side or the flat side facing out.
-
Installation: Step 3
Place the Top Part on top of the Dividers, slotting the Dividers into the same grooves as in the Bottom Part.
Press the side of the Top Part into the side of the cabinet to release the spring mechanism.
That’s it! You’re ready to organize your sheet pans!